Best Way To Clone Cannabis Plants

Replicating beautiful flowers is not limited to florists. It’s a core skill set that every cannabis cultivator needs to master. We’ve created this article specifically to help you get started with the cloning of your own favourite cannabis plants.
What Is Cloning?
Cloning or taking cuttings of cannabis plants is technically asexual propagation. In perhaps too simple terms, it’s Xeroxing weed. Marijuana, like plenty of other plant species - even the roses in grandma's garden, can be copied. It’s a common practice and technique most ordinary gardeners are very familiar with.
Clones are duplicates, but also as old as the mother plant from which they were taken. Clones cannot be improved or worsened in quality by the genetic lottery of sexual reproduction, but just deliver the same level of quality, year after year. There are known instances of clones that have been reproduced 50 times in succession, without any loss of quality (provided of course that the clones were all taken from a healthy specimen).
WHY CLONE A CANNABIS PLANT?
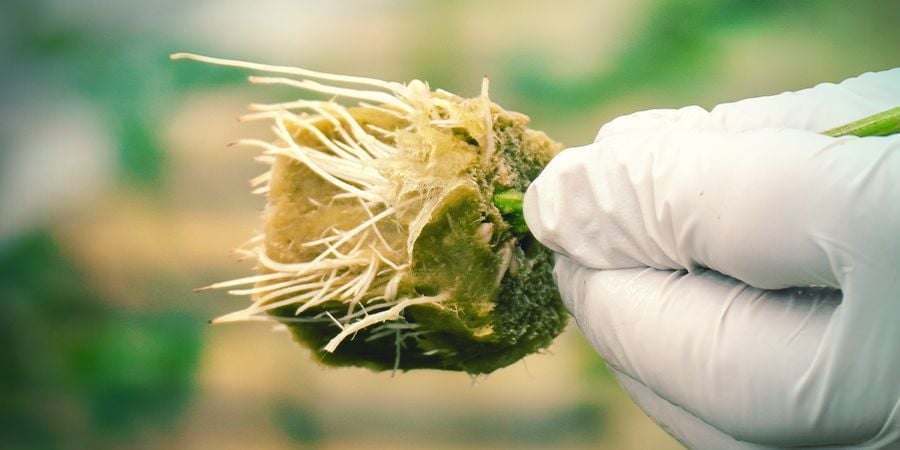
The three key advantages of cloning cannabis are as follows:
1) Preservation of genetics - A mother plant can be selected and that choice phenotype can be cloned repeatedly. Ongoing crops of any cannabis strain can be maintained. Careful selection of a mother plant and then keeping her in vegetative growth is all it takes. Every grow is a known quantity with no unpleasant surprises. The legendary Exodus Cheese was a killer phenotype a wise grower cloned.
2) Crop Rotation - Cloning cannabis also facilitates crop rotation. While one batch of clones is flowering another can be simultaneously in vegetative growth. This is a great system if you desire perpetual bud harvests. No need to preserve a mother plant; just take cuttings from the plants before you switch to 12/12. Get the next batch of clones rooted as the latter transition to bloom and repeat.
3) Breeding - Cannabis breeding might be the last thing on your mind or just over the horizon depending on your personal circumstances and objectives. However, the best breeding stock is often derived from a tried and tested cannabis clone.
Of course, cannabis cloning requires two grow ops. These days, most growers buy one large grow tent for mature plants and a smaller micro tent for cuttings. We’ll discuss cloning environments in more detail a little later and outline a suite of options.
STEP BY STEP CLONING GUIDE
-
Select a mother plant or any plant still in vegetative growth - It is so important to choose wisely. Cannabis plants must be scrutinised for desirable attributes and the grower must not settle for second best. Vigorous growing, fast flowering, potent and productive marijuana specimens are what you want.
-
Get the right tools for the job - A sterile sharp scissors, a bottle of rooting gel, some rooting medium and a propagator will suffice. Scalpels are for surgeons if you don’t have an MD you have no business wielding one. In any case, they are unnecessary. Simple is safe.
-
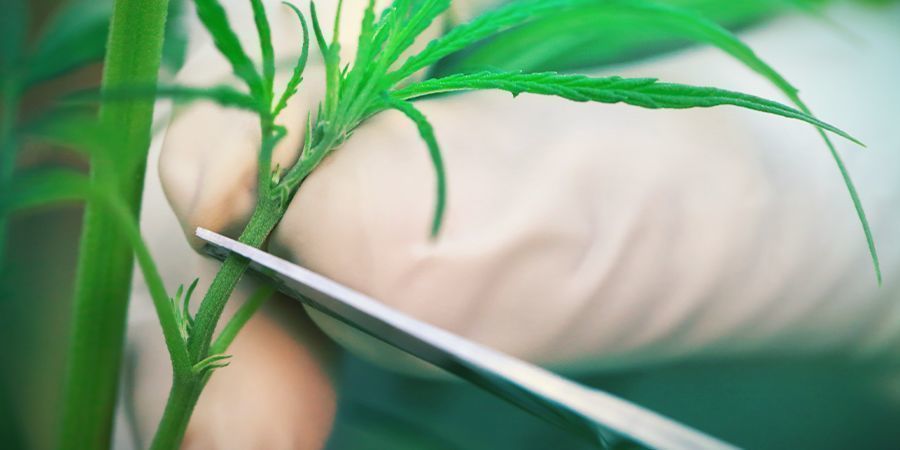
Cut a branch - Using your scissors snip off a healthy branch from your mature mother plant. Remove the whole branch clean. Bottom branches that are usually removed to increase airflow need not be binned. Turn lower growth into a resource and use it for cloning. They are the oldest branches and tend to root well as clones. Even if they fail you still have plenty of material left to work with on your mother plant. It’s win-win.
-
Cut clones to size - Remove excess stem and leaves. Try to keep clones less than 10cm. It’s easier to fit them in a propagator and more practical. Aim for a node on the branch and make the cut at a 45-degree angle to increase root surface area. Swiftly dunk the open wound in a dish- or cap-full of rooting gel and pause for 3 seconds.
-
Make the transplant - Make a small hole in the pot’s soil with a pencil or nail. Make sure it’s moist and ideally housed in a propagator. Plant the cutting carefully in the hole and press the soil around it gently in, giving it some water if it looks like it needs some.
-
Trim remaining leaves - Snip off about one-third from the set of remaining fan leaves. It’s no longer a branch. It’s a micro plant now so consider this streamline pruning. In 1-3 weeks clones should root. That’s conventional cannabis cloning.
UNCONVENTIONAL CLONING: MONSTER CROPPING
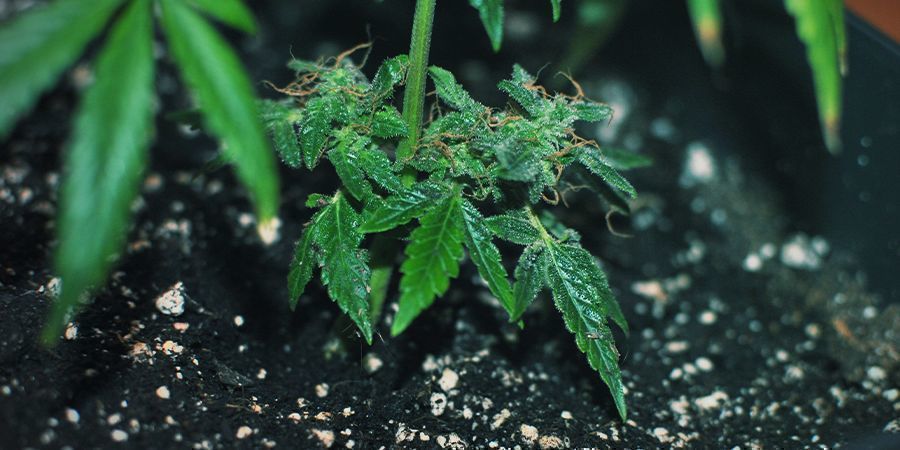
Taking cuttings from flowering cannabis plants is not recommended for novices. But for those with a little cloning experience, this is definitely worth an experiment. Monster Cropping is the common grower term for taking clones from plants 30 days into bloom. The same basic cloning technique is the same as the conventional method described above.
Monster cropping is an apt term. These are no ordinary clones. These are monsters. When re-vegged and rooted, these clones will resemble topped plants with extra vigorous lateral growth and dense branching. Leaves will be mutated and branching - though prolific - will be anything but symmetric. A beauty queen she is not, but come harvest time, this monster will be laden with buds.
HOW TO TAKE CARE OF YOUR CANNABIS CLONES

Especially during the first week, keep the clone good and moist. Give the clones leaf nutrition regularly, if possible by spraying them with the plant mister (into which you’ve dissolved a teaspoon of fish emulsion per litre of water). After each leaf feed, spray them later with pure water to clean the leaves.
After ten days to two weeks you’ll be able to see the first roots poking through the base of the pots. If you’re using small pots, then it is time to take them out of their incubator and plant them. Cuttings in larger pots can stay a while longer until they’re a bit bigger. TIP: make the pots good and wet before you replant; the little roots can then easily grow through the moist, paper-like peat dust.
Only bother to re-pot the best specimens. If you’re working with various varieties of plant, label each clone clearly right at the start. Rooted clones can be re-potted in bigger pots (10-20 centimetres diameter).
GROWING MEDIUM
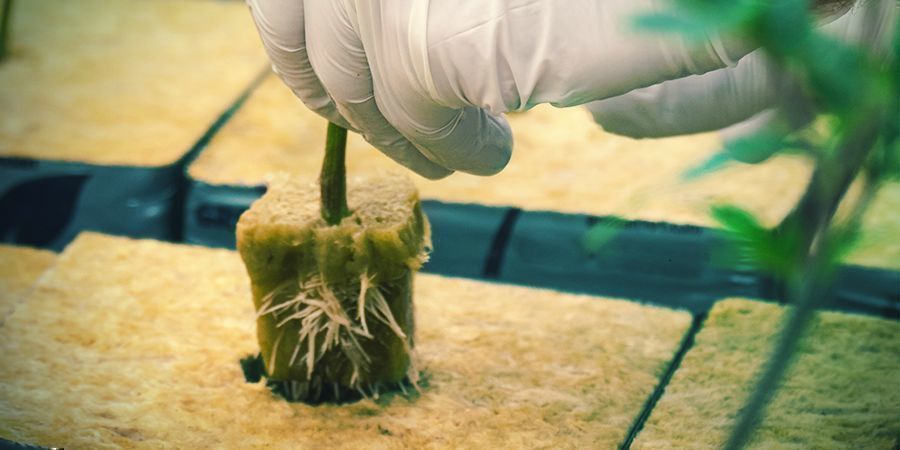
Rooting cubes are the best choice starter medium as they can be easily transplanted into any kind of final medium later. Planting directly into soil or coco can work too, but use small containers, 0.5-2L is fine. Remember the medium needs to be wet not water logged.
Instead of using rooting cubes you can also fill peat dust pots yourself:
- 1/3 compost (holds moisture well, contains some nutrients)
- 1/3 seed/cutting soil
- 1/3 Perlite (adds some aeration to the mixture)
Fill the pots with the mixture, make them good and moist then place them under the lamp in order for them to come to the right temperature. Rooted clones do not so much need light they do as warmth for them to develop their root system. Keep the root temperature at a minimum of 20 degrees Celsius, preferably 25 degrees. For this use a soil warmer (small mat or cable) or keep the air temperature a few degrees higher than the desired root temperature. For measuring the root temperature use one or more aquarium thermometers (costing 2-3 Euros each). Tip: when buying, always place a few next to each other on the counter and only buy those meters that give the broadly same reading as each other.
PEAT DUST POTS VS. ROCK WOOL

There are also small rock wool blocks you can use as a cutting medium. These work no better than peat dust, are much more expensive, environmentally damaging (they don’t perish) and you have to use them the moment they’re ready. That said, they are better if you need to transport the clones; you can even drop them without causing damage, which is not something you want to try with peat dust plants. They are also quicker and easier to use. You just lay them on a bed of perlite, so that air can get underneath them, and soak them with water into which some rooting hormone has been dissolved. Rockwool is great for hydroponic growers. The blocks come from the factory with holes ready made, into which you stick the cuttings. Press them a little bit further down into the block, so that the cuttings are standing firmly upright.
You stick the cuttings into the peat dust or rock wool blocks and spray the clones once with root hormone-laced water. A litre is sufficient for several sprayings over the first 48 hours. The hormone percolates through the cell walls of the clone - and Bob’s your uncle! If you’re a natural purist, then take some willow twigs and make a hormone-containing extract or place the stem in your mouth to wet it with saliva, which also seems to work.
NUTRIENTS
If you use rooting cubes they will only need to be watered sparingly. Typically they contain sufficient nutrients for clones and or seedlings to root well in the first 1-3 weeks of life.
LIGHT
18+ hours of cool white CFL or MH illumination is optimal for cannabis clones. The light need not be intense or high wattage. In fact, many growers find cuttings slightly shaded by the mother plant in a grow tent root successfully.
ENVIRONMENT
High humidity, approximately 70% is just right for clones. Cooler temps are preferred to keep stress to a minimum, ideally 20-25°C. A sunny window sill is a good clone habitat. But a propagator is a great habitat and doesn’t take up much space in the grow op or cost much either. Propagators are perfect self-contained habitats. Some modern models have latest low wattage LED’s built-in to enable stand alone seed or clone propagation.


 United States


