
How To Make A Laminar Flow Hood For Mushrooms
Often find mould growing in your substrate where there should be mycelium—even though you've cleaned everything with alcohol and bleach? Well, things float on the air. To create the ultimate sterile environment, a laminar flow hood gives you a constant supply of sterile air to work in. Get ready for huge yields and great success.
Inoculating a substrate with spores can be an exciting time. After hours spent cleaning, pressure cooking, and sterilising equipment, you want it to be a success. But you can’t sterilise the air (though you can bring sterile air in), and fungal spores or bacteria can easily contaminate and colonise your grow, ruining much hard work. How to get around it? Build a DIY laminar flow hood, and enjoy the sterile pleasures of a clean working environment.
What Is a Laminar Flow Hood?
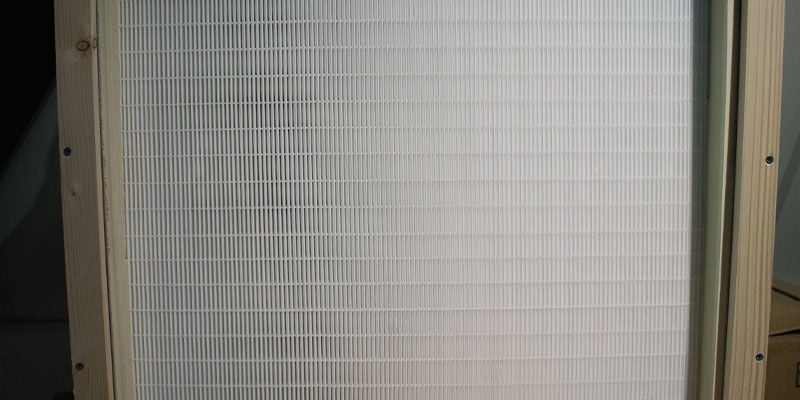
A laminar flow hood creates an environment with sterile air in which to inoculate substrates (and do other activities that require clean air). By filtering air, and then blowing this sterile air through the space, air carrying other fungal spores or bacteria is blown out of the space.
Why Is a Laminar Flow Hood Important for Cultivating Mushrooms?
The environment in which psilocybin spores germinate and mycelium grows is equally suited to other fungi and bacteria. In fact, many other organisms grow quicker and more aggressively, and will outcompete the mushroom mycelium. Therefore, creating a sterile environment makes it much more likely that the mycelium will take, and something else won’t.
How Does a Laminar Flow Hood Work?
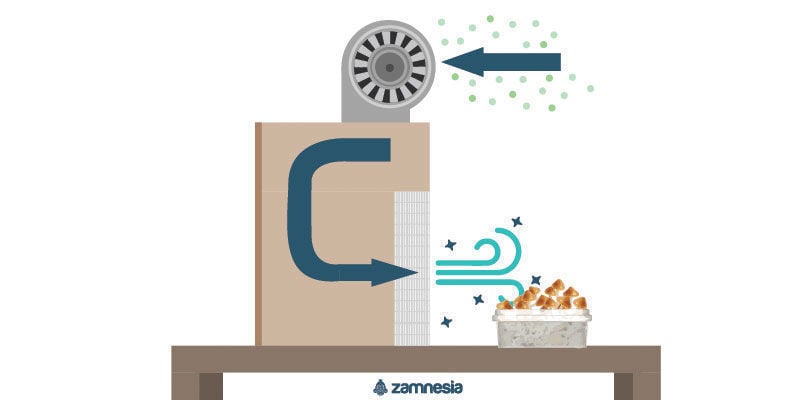
A laminar hood works by drawing air through a filter, and then blowing the sterile air into the workspace. By bringing clean air in and pushing normal air out, a much cleaner environment is created.
HEPA Filter
A high efficiency particulate air (HEPA) filter can remove up to 99.995% of dust, pollen, mould, bacteria, and spores from the air. Specifically, you'll want an H14 HEPA filter. These filter almost everything, with particles of 0.3 microns being most easily able to slip through. Other particles, whether bigger or smaller, are trapped with greater efficiency. 99.995% is the worst case scenario, referring to particles of 0.3 microns. So as you can gather, they catch pretty much everything, even the really small stuff.
Blower Fan
A blower fan draws air through the HEPA filter and then blows it into the workspace. By blowing air, it draws air in from without. This is mounted on the side or top, with the HEPA filter mounted on the front of the box. You must make sure that the blower fan and the HEPA filter match in terms of static pressure (more on this shortly) to ensure that air is properly drawn through.
Wooden Box
It doesn’t have to be wooden, but wood is a reliable, safe, and easily manipulable material, so we suggest it. It may be worth sealing the wood, especially the joints, with varnish and silicone. As the blow fan pushes air out, it will pull air through any available spaces, not just the pre-filter. So to avoid unclean air accidentally being pulled in, it’s worth taking this step.
How To Match the Blower Fan With the Correct Filter
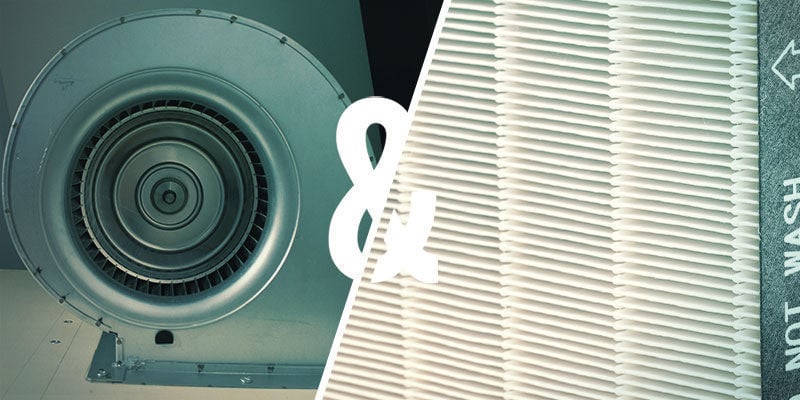
Every HEPA filter has a “working point”. A working point is the amount of pressure it takes to force air through it. This is expressed as static pressure—the amount of pressure a filter can resist.
Static pressure is expressed in inches of water gauge (iwg). The symbol for unit pressure is Pa (Pascal). Roughly, 1” is equal to 250Pa. This is a little confusing, but it’s worth making note of, as your flow hood will be useless if you use the wrong fan.
HEPA filters will usually have a pre-filter too. These are to remove the biggest particles. Usually, these will require 0.2” (50Pa). Take this into account too.
To be effective, air should be blowing through the filter at about 100ft/minute.
Note: The following will be shown in feet (ft), as this is how air speed is calculated. However, you may well be working in metric. If this is so, it’s an easy conversion. 1 foot = 30.5cm. Or, 1cm = 0.032808399 feet. There are plenty of calculators online to help you with this.
To determine the correct blower for your filter, use these steps:
-
Find the area of your filter. This is simple; multiply the width by the height. For instance, if your filter is 2ft by 1ft, then you’d do: 2ft × 1ft = 2ft²
-
You’d then multiply the required air speed (100ft/minute) by your area. 100ft/min × 2ft² = 200 ft³/min.
-
200ft³/min = CFM (cubic feet per minute). This is the air pressure needed to force air through your filter at 100ft per minute.
-
1 CFM = 1.7m³/h
-
Combining the two filters, your blower must deliver 200 CFM (340m³/h) at a static pressure of 1.2” (300Pa).
Filters and blowers will come with charts to help you find out which is suitable. By working out the above numbers, you can compare these with the resources provided to find what you need.
Though it may seem very confusing, just replace the above numbers with your own and it should be fine. There should also be instructions and resources available from manufacturers.
How To Build a DIY Laminar Flow Hood for Mushroom Cultivation
Below is a step-by-step guide on how to make your very own laminar flow hood, and what you’ll need to do it. The process outlined is but one of many ways to do it, and we encourage you to experiment and adapt it however you see fit.
Equipment for Laminar Flow Hood
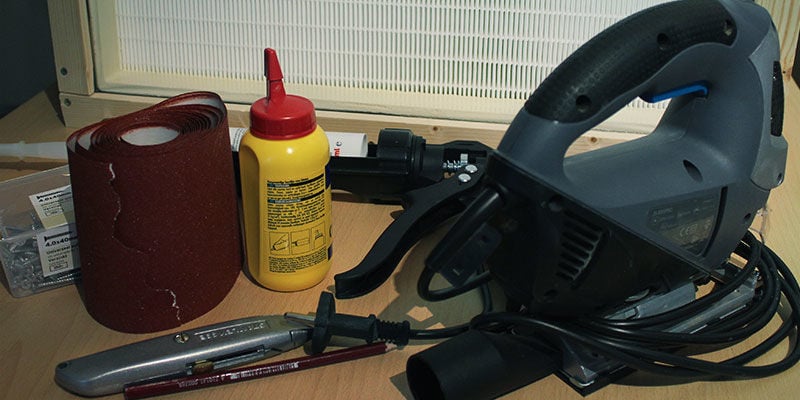
You’ll need a fair bit of equipment. This list is by no means exhaustive, but you should be able to make a flow hood to a good standard with the equipment below.
Filter & fan
- 24 × 24” or 24 × 48” HEPA Filter, with efficiency of 99.995% (use the information above)
- Pre-filter, to remove large particles
- Blower fan
Box
- 2× Plywood sheets 4’ × 8’ × ¾”
- 1× Length of batten
- 1× Box of 56mm wood screws
- Carriage bolts
- Wood glue
- Silicone
- Length of door frame weather stripping
Electrical
- 14-Gauge extension cord with 50cm of armoured cable
- Utility box, utility cover, toggle switch
- Electrical tape
Tools
- Circular saw with guide or table saw
- Drill with bit for 56mm screws
- Jigsaw for fan outlet hole
- Clamps
- Caulking gun (for silicone)
- Sandpaper
- Measuring tape
- Square
- Pencil
- Knife
Laminar Flow Hood Directions

On to the instructions. There are a lot of steps, but each is fairly simple. Though they may seem baffling at first, once you begin working, they will start to make sense.
We don’t know what sizes you’re going to be working with, so we’ve gone with a 24 × 48” HEPA filter, as it is this measurement that the rest of the box will be based off. However, it will be easy to adapt the measurements to your own requirements. All cuts will be made based on either the face of the HEPA filter or the outlet of the blower fan.
Step 1
Cut one sheet of plywood into 4 pieces. These will make the bottom, sides, and top. The back will be cut later; the front will be the HEPA filter.
- The top and bottom should be cut at 24 × 48”
- The sides at 25.5 × 20”
Sand the edges for a smooth fit.
Step 2
Cut the batten to the length of the top/bottom piece of ply—48”.
Screw onto each piece, drilling pilot holes first.
The batten should be set back from the front edge of the ply (where the HEPA filter will be) by the depth of your chosen HEPA filter. These will be its internal supports.
The bottom length of batten should lie with the widest side against the ply. The top should have its narrowest length against the ply.
Step 3
Now, attach the side pieces of ply. Use wood glue and screws, ensuring as square a fit as possible using clamps. This will make it airtight and ensure the HEPA filter actually fits. Use your square to check before the glue dries.
Before proceeding, and perhaps before applying the glue, check that the filter fits snugly, without having to be forced.
Step 4
Cut a hole in the top for the blower fan. Drill four pilot holes (one in each corner), then cut out a square with a jigsaw. This should be the size of the fan outlet.
Sand the edges.
Step 5
Instal the weather stripping around the edges of the square hole. This will prevent leakage.
Step 6
Cut ¾ × ¾” plywood strips to the length and width of the hole. Remember that either the length or width will have to fit inside the other, and will be shorter than the edge of the hole by ¾” × 2.
Screw these on top of the weather stripping.
Step 7
The fan should now fit tightly into this hole. You can add silicone to ensure minimal air leakage.
Step 8
You may need to create a “shim” to support the back of the blower fan. Adjust this to the needs of your specific fan. It can be made from an offcut of ply, cardboard, or anything else suitable. It just needs to take the unequal weight.
Step 9
Using screws or carriage bolts, secure the fan through the plywood stripping edges (the ones mounted on top on the weather stripping). It’s okay to go through the metal casing into the outlet of the fan.
Step 10
Attach the pre-filter to the inlet of the blower fan. If you want to, you can build a box for this, which will encase the fan and make it look neater. However, we’ve skipped this as it is unnecessary and further complicates an already complicated procedure.
Step 11
Connect your switch to the blower fan. We are not electricians, and thus not qualified to instruct for this stage. However, most fans will come with simple instructions on how to do this. If in doubt, consult an electrician.
Fix the switch to the top of the box.
Step 12
Insert the HEPA filter into the front of the box. If the box has been constructed properly, it should fit comfortably. The back should meet the strips of batten, with the front lining up with the edge of the plywood.
Then, cut more strips of ply and attach these to the front, covering the gap between the filter and the box. Cut to the appropriate lengths. Seal the gaps with silicone, but do not glue these strips. It needs to be easy to remove them and remove the filter.
Step 13
Time to add the back.
Before doing this, thoroughly vacuum and clean the inside. The pre-filter won’t be of much good if the inside is full of sawdust!
Make the back exactly the same size as the HEPA filter.
Cut strips of batten, and place them ¾” from the back edge, in each corner. This will give the back something to sit against, and something to screw into.
Silicone the joints.
How To Clean a Laminar Flow Hood
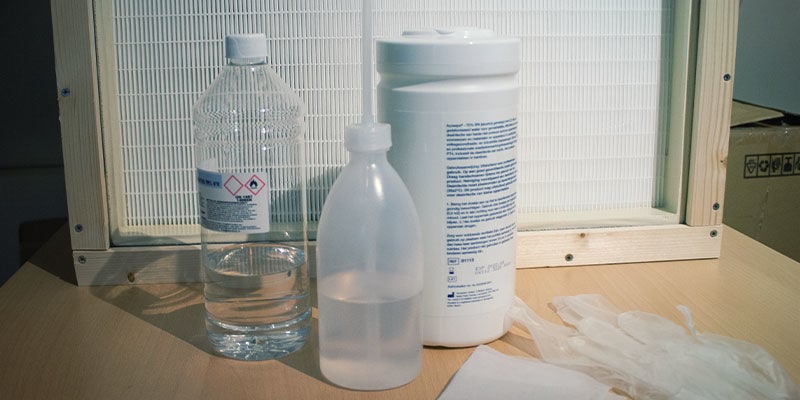
It will come as no surprise that cleaning a laminar flow hood is essential to its proper function: to create a sterile environment. The easiest way to get inside will be to remove the front strips and the filter, and access it that way.
What You Need
- Ethanol (alcohol cleaner) — avoid soap and water
- Lab-grade wipes
- Lint-free cloths
- Clean clothes
- Latex/clean washing-up gloves
How To Clean
Clean back to front, top to bottom. This will make sure you don’t accidentally dirty an area you’ve already cleaned. Make long, smooth, horizontal wipes, and overlap each one. Use a clean cloth for each wall.
Do not try to clean the HEPA filter. This should be replaced once in 5–10 years depending on usage.
Do You Need a Laminar Flow Hood To Grow Mushrooms?
You do not need a laminar flow hood to grow mushrooms. However, if you go through the effort of making one, you will get back the hours in terms of how much effort is saved through lack of contamination. While the process is complex, it is an interesting project, especially if you have a friend to do it with.
Though not the cheapest project in the world, it shouldn’t break the bank either. If you do the odd inoculation, then maybe a laminar flow hood is not for you. But if you’re a budding mycologist and find yourself making batch after batch, then a flow hood is the next step in getting serious, and will make life much, much easier.
-
 5 min
November 15, 2024
How to Build Your Own Monotub and Grow Mushrooms in Bulk
There are many ways to grow magic mushrooms, and for the biggest yields, you can't really do better than a monotub! Quick, easy, and very productive, find out how to make one here.
-
 4 min
September 27, 2022
How To Take Magic Mushroom Spore Prints
In order to grow magic mushrooms from scratch, you need spores. It's from these tiny things that everything else grows! Taking your own spore print is easy enough, and can be the beginning of a...
-
 3 min
April 25, 2022
What Is A Magic Mushroom Spore Vial?
Embarking on the journey of magic mushroom cultivation? One of the first things you need to do is source some spores. But should you choose a vial or a syringe? Here we explain the benefits of...
-
![How To Grow Magic Mushrooms Indoors [3 Methods]](https://www.zamnesia.com/us/modules/prestablog/themes/responsive/up-img/slide_2060.jpg?caf944d1febfc09552745fdff7015a5c) 5 min
February 22, 2022
How To Grow Magic Mushrooms Indoors [3 Methods]
Growing magic mushrooms at home needn't be difficult. Here we look into three different growing methods, ranging from the beginner-friendly to the advanced. Whichever one you choose, big, healthy...
5 min
February 22, 2022
How To Grow Magic Mushrooms Indoors [3 Methods]
Growing magic mushrooms at home needn't be difficult. Here we look into three different growing methods, ranging from the beginner-friendly to the advanced. Whichever one you choose, big, healthy...
-
 4 min
December 11, 2020
Sterile Technique For Growing Magic Mushrooms
Growing mushrooms is a magical experience, but things can sometimes go wrong. Floating microbes can easily contaminate mushroom cultures when they're exposed to the open air. Use these tips and...
-
 6 min
June 30, 2020
Everything You Need To Know About Magic Mushroom Substrates
If you’re cultivating magic mushrooms in bulk, or without a grow kit, you'll need to prepare a mushroom substrate. In this guide, you will learn everything you need to know about the right...


 United States


