How to dry your cannabis
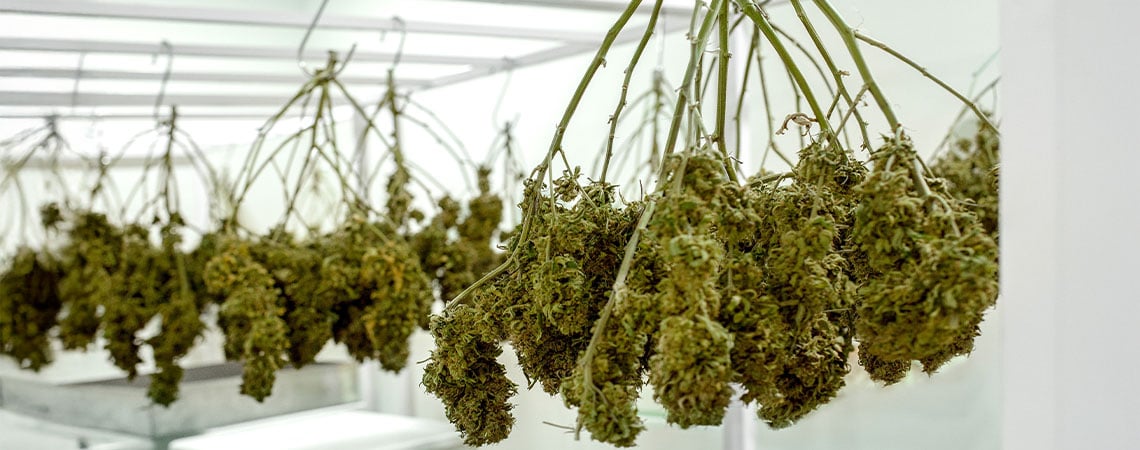
Drying your cannabis is a vital part of the post-harvest process. With a massive range of benefits, taking the time to dry your buds is paramount to enhancing their flavor, aroma, and potency, as well as their shelf life. Below, you’ll find a complete guide to drying weed like a pro.
You've watered, fed, and tended to your weed plants for many weeks. Now, after the all-important harvesting process is over, arguably the most crucial stages of your grow follow: drying and curing. Unfortunately, this is often where many growers (especially novices) fall at the final hurdle, ruining their hard work by not priming their buds for consumption.
But don’t worry, we're here to guide you through the drying process so you can reap the rewards: top-shelf cannabis. Note that the guide below focuses solely on how to dry weed. If you're looking for information on trimming, curing, or storing your buds, check out our other relevant guides.
Why do you need to dry your cannabis?
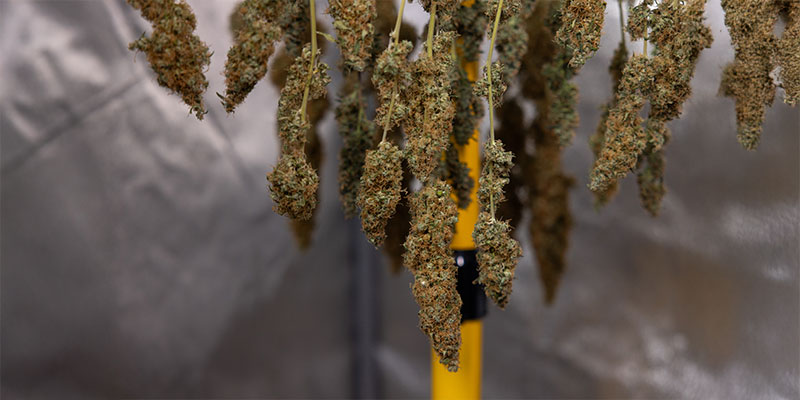
Wondering why you need to dry cannabis in the first place? Unfortunately, you can’t just rip buds off a plant and start smoking them. Freshly plucked cannabis buds are filled with moisture that needs to be removed before you can enjoy them. Drying your buds helps the moisture from the flowers evaporate, removing any harshness and allowing the plant's delicious terpenes to stand out. Most importantly, drying primes your buds for storage and helps to prevent mold from destroying your stash.
Beyond these benefits, drying also initiates chemical changes such as decarboxylation, which is essential for activating key cannabinoids, unlocking their potential when it’s time to light up.
What's the difference between drying and curing?
Some growers believe that the terms “drying” and “curing” are interchangeable. However, that’s not the case.
As the name suggests, drying removes moisture from cannabis buds. Curing, on the other hand, occurs after the drying process and involves storing your dried cannabis in an airtight container for at least two weeks.
Curing significantly enhances the flavor, smoothness, and potency of your flower by allowing chemical changes (like decarboxylation) to slowly continue. Moreover, it also improves the shelf-life of cannabis and prevents the degradation of valuable cannabinoids.
Here's a handy table to refer to for the benefits of proper drying and curing:
| Flavour & Aroma | Smoke Quality | Risk of Mould | Potency | |
|---|---|---|---|---|
| Proper drying & curing | Fragrant, full-bodied, and rich | High | Low | High |
| Improper drying & curing | Harsher taste, poor aromas | Low | High | Low |
For a full breakdown of how to cure your buds after drying, be sure to check out our curing guide.
Optimal conditions for drying cannabis
Drying your cannabis in the right conditions is critical to preserving the quality, potency, and flavor of your buds. Further down, we’ll look at a number of different drying methods. Whichever one you choose, your drying environment will have a major effect on the quality of your final product.
If, for example, your drying space is too humid or poorly ventilated, your flowers may develop mold. If it’s too hot or dry, on the other hand, you risk degrading valuable cannabinoids and terpenes, resulting in weed that tastes harsh and lacks potency.
Consult the table below for an overview of the perfect conditions for drying cannabis:
| Factor | Ideal Range | Why It Matters |
|---|---|---|
| Temperature | 60–70°F | Too hot = cannabinoid loss. Too cold = slow drying and increased mould risk. |
| Relative Humidity | 50–60% RH | RH above 65% = mould. RH below 45% = drying too fast, harsh smoke. |
| Airflow | Gentle, indirect, consistent | Never point directly at buds. |
| Light Exposure | Complete darkness | UV light breaks down cannabinoids and terpenes. Always dry in the dark. |
| Drying Time | 7–14 days | Buds are ready when small stems snap cleanly, not bend. |
| Bud Spacing | 1 inch between buds | Prevents buds from touching for even drying and mould prevention. |
Maintaining these conditions will help ensure your buds dry evenly and slowly, locking in potency and smoothness while avoiding spoilage.
Tools to maintain the ideal drying environment
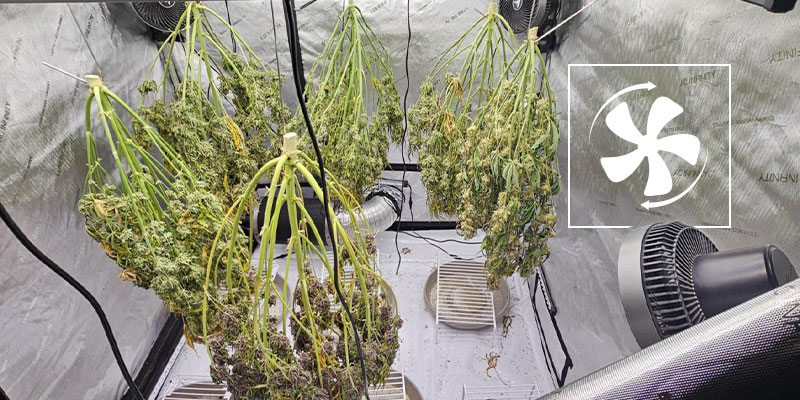
To create the perfect drying space, a few essential tools can make all the difference:
- Thermo-hygrometer: This tool is essential for accurately monitoring the temperature and relative humidity in your drying area.
- Humidifier/dehumidifier: Perfect for adjusting and maintaining the optimal relative humidity level.
- Air conditioner: An AC unit can help you stabilize and regulate the temperature in your drying space, especially in warmer climates.
- Oscillating fan: Provides gentle, indirect airflow to promote even drying, stable temperatures, and prevent mold.
Different methods to dry your cannabis
There are several effective ways to dry cannabis at home, and the best method often depends on your available space, budget, and personal preference. Whether you're working with a small or large harvest, there's a solution below to suit your needs.
Regardless of what method you choose, remember it's crucial to ensure that your buds never touch each other during drying. This prevents mold and promotes airflow, leading to consistent drying results. Also, you’ll want to decide whether you trim your buds before (wet trimming) or after drying them (dry trimming). Check out our dedicated trimming guide for more information.
Cardboard box method
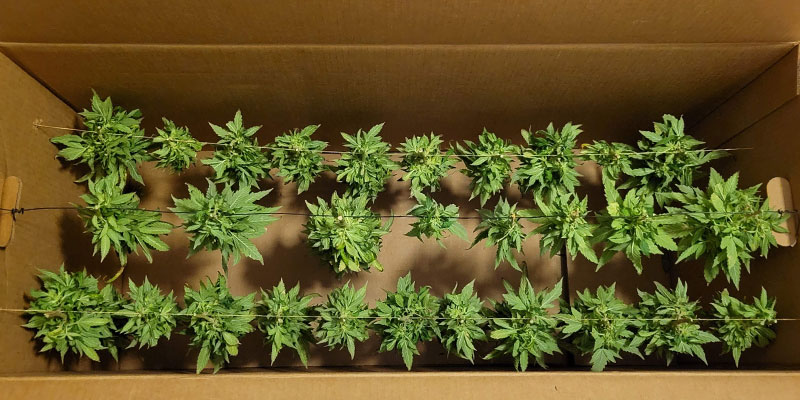
The cardboard box method is a cost-effective and discreet way of drying cannabis that’s well-suited to small-scale growers or those with limited space.
Setup instructions:
- Line the inside of a large cardboard box with string, mesh, or wire from which you can suspend buds or small branches.
- Poke several air holes in the sides of the box to allow passive airflow.
- Place the box in a dark, well-ventilated room away from direct light or heat sources.
Practical tips:
- Space buds at least 1 inch apart to prevent moisture buildup and ensure even drying.
- Open the box once daily to inspect for mold and promote fresh air exchange.
- While cardboard naturally absorbs moisture, it can also trap smells and cause uneven drying if not monitored closely, so check your setup regularly.
Hang drying
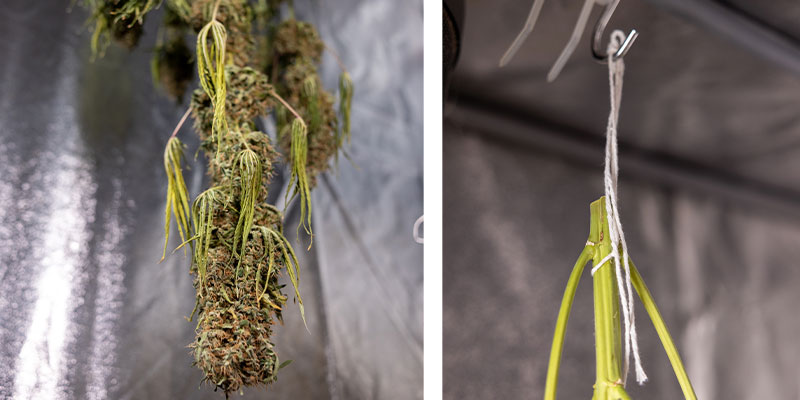
Hang drying is the most traditional and widely used method among home growers, valued for its simplicity and effectiveness.
Setup instructions:
- Hang trimmed branches or individual buds upside down using string, coat hangers, or a drying line in a dark, temperature-controlled room.
Practical tips:
- Hang branches or buds 2–4 inches apart to allow proper airflow.
- Place a small fan in the room to help maintain stable temperatures and humidity levels. However, do not point the fan directly at the buds.
- Check your plants daily for any signs of mold, over-drying, or brittle stems. Buds are finished drying and ready for curing once their stems snap rather than bend.
Using a drying rack
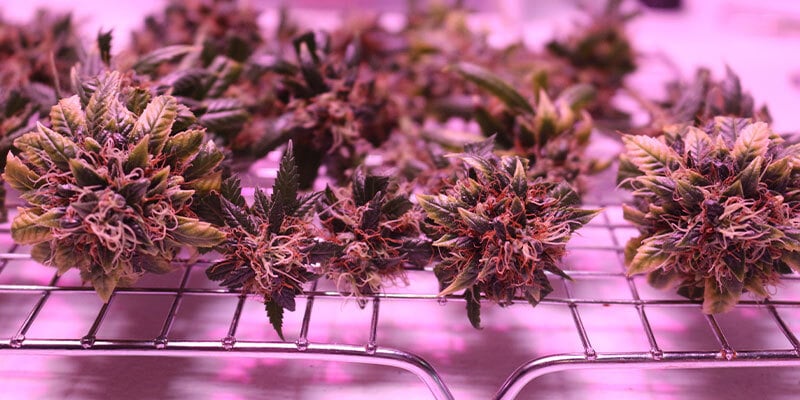
Drying racks are purpose-built for drying cannabis. They are compact and scalable, perfect for growers handling medium to large harvests, especially in indoor setups with limited hanging space.
Setup instructions:
Set up your drying rack in a dark, temperature-controlled room or inside a grow tent. Spread your trimmed buds evenly across the surface of your rack’s mesh shelves or trays.
Practical tips:
- Leave at least 1 inch of space between each bud to allow airflow and prevent moisture buildup.
- Never stack buds on top of each other.
- Gently rotate your buds once or twice a day to ensure even drying across all sides.
This method efficiently uses vertical space and allows you to dry large numbers of buds at once.
Herb drying nets
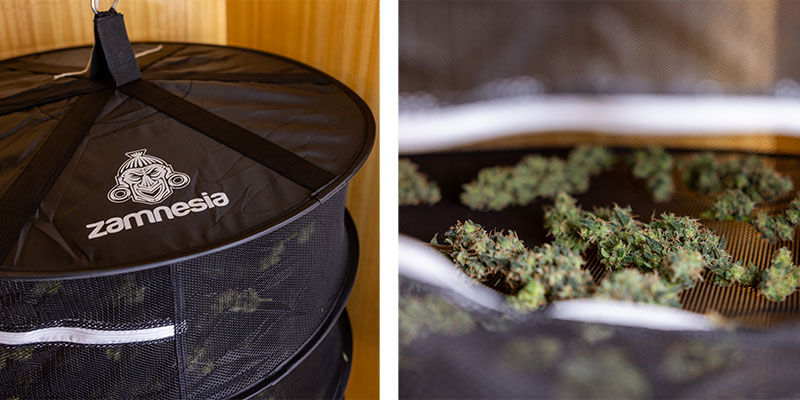
Herb drying nets are well-suited for drying cannabis buds and offer a practical solution for growers requiring a space-efficient, organized drying system. We recommend using our herb drying net for the best results.
Setup instructions:
- Place your buds in a single layer on each mesh shelf. Make sure they do not overlap, as this will restrict airflow and increase the risk of mold.
- Hang the net from a ceiling hook in a dry, dark, and well-ventilated room, or inside your grow tent.
- Keep the net away from walls so it can rotate a full 360° and maximize airflow around your buds.
This method is not only highly efficient and tidy but also makes rotating and checking your buds quick and easy.
Growshop
Set up your grow the right way. Tents, lights, nutrients, propagation supplies, pots, and many handy accessories.
How long does it take to properly dry cannabis?
Under the ideal conditions described above, cannabis typically dries in 7–14 days. However, this can vary depending on several factors:
- Bud size: Larger, denser buds hold more moisture and take longer to dry than smaller ones.
- Humidity levels: Higher humidity slows drying, while lower humidity speeds it up (but may cause over-drying).
- Temperature: Cooler temperatures slow the drying process, while warmer temperatures can dry buds too quickly.
- Airflow: Proper ventilation supports even drying and helps prevent mold.
- Trimming method: Wet-trimmed buds usually dry faster than dry-trimmed buds because they contain less plant material.
Remember, patience is key! Rushing the drying stage can severely impact the flavor, aroma, and potency of your cannabis.
How do you tell if your buds are properly dried and ready to cure?
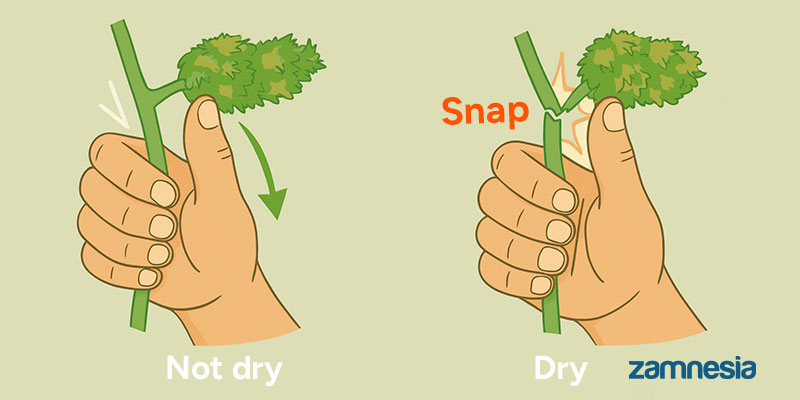
Many growers use the simple and reliable “snap test” to check whether their cannabis is dry and ready for curing.
To do this, gently bend one of the stems connected to your buds. If it snaps cleanly, your cannabis is likely dry enough and ready to cure. If the stem bends or feels rubbery, it still contains too much moisture, indicating that your buds need a little more time to dry.
When conducting the “snap test,” always check multiple buds throughout your batch to ensure your weed is drying evenly. Sometimes, you may need to move on and cure your smaller, faster-drying flowers first while you wait for the larger buds to catch up.
Common mistakes when drying cannabis
Here are some common cannabis drying pitfalls to watch out for and ensure you’re left with smooth, high-quality buds every harvest:
- Drying in direct light: Exposing your buds to UV light breaks down cannabinoids and terpenes, reducing their potency and aroma. Always dry your weed in a completely dark space.
- Too much heat: High temperatures can dry your buds too quickly, leading to harsh flavors and the loss of delicate terpenes. Always dry your buds at 65–70°F for the best results.
- Poor air circulation: Without proper airflow, moisture lingers, and mold can develop. Promote indirect airflow with fans and never let air blow directly on your buds.
- Overcrowding buds: When buds touch or pile up, they trap moisture, creating the perfect environment for mold. Always space your flowers apart, regardless of the drying method you’re using.
Keep these mistakes in mind when drying your cannabis to preserve its flavor, potency, and overall quality.
Ready for the next step? Start curing your weed today!
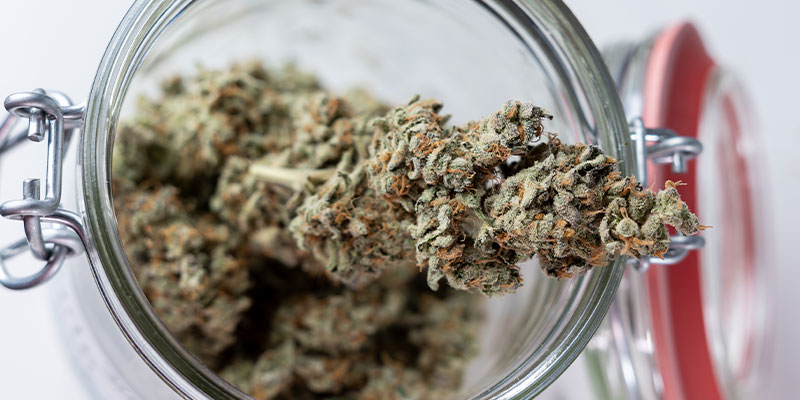
Drying your cannabis properly is a vital step that sets the foundation for a smooth, flavorful, and potent final product. By following the right method and maintaining ideal environmental conditions, you'll protect your harvest from mold, harshness, and unnecessary potency loss.
But remember, drying is only half the process. To unlock the full potential of your buds, the next step is curing. Curing not only enhances smoothness, flavor, and potency but also improves long-term storage.
Curing requires specific equipment, such as jars and hygrometers. Be sure to check out our complete curing guide for full instructions as well as a list of all the recommended tools you'll need to finish your harvest off properly.


 United States


