
Building An Automated Cannabis Curing System: Step-By-Step
If you want your weed to taste good, you have to cure it. But if opening jars every day for six weeks feels like a bit of a drag, then we have just what you need. Keep reading to find out how to build an effective cannabis curing system at home.
The cannabis cultivation journey never seems to end. You plant your seeds, tend to them as they grow, harvest them, dry them… and still you can’t smoke them! But the final step of curing is well worth the effort.
Here we compare manual and automated curing, then give you a simple but effective method for making your own DIY automated cannabis curing system at home.
Why curing cannabis is so important
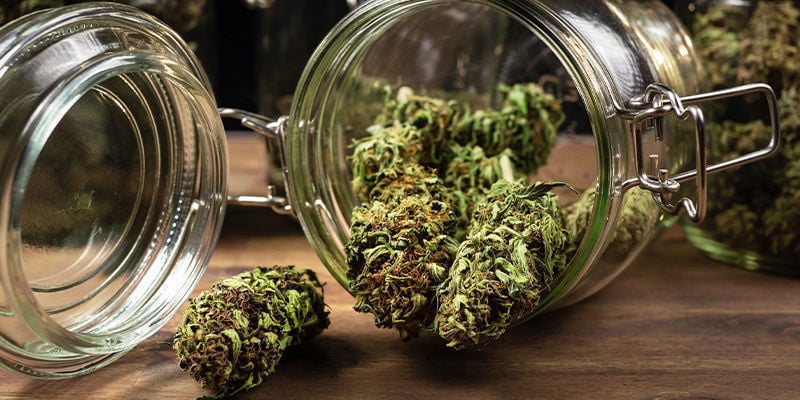
Curing cannabis is the final step in the cultivation journey. And while, by this point, most of the hard work seems out of the way, it’s actually a crucial step if you want your buds to truly taste great. You can technically smoke or vape your weed once it’s been adequately dried, but if you left it at that, you’d have a pretty low-quality product that would be harsh and not all that tasty. Curing is the process that brings out all the best flavours your cannabis has to offer, and helps to make for smooth and pleasant hits.
If you want smooth weed with a rich terpene profile, you have to cure it.
Curing can take anywhere between two and six weeks, depending on how refined you want your finished product to be. As a general rule, the longer you cure, the better your weed will taste. The process of curing, in a nutshell, involves storing dried bud in an airtight jar or container. Once a day, the humid, stagnant air from this jar is released—a process called burping—and fresh air is allowed in. In this way, the humidity doesn’t get too high, the weed slowly dries, and the risk of bacterial or fungal growth is reduced.
Many growers perform this task by hand, going to their curing jars once a day to open them and allow for air exchange. But what if you could automate the process?
Curing cannabis: manual vs automated
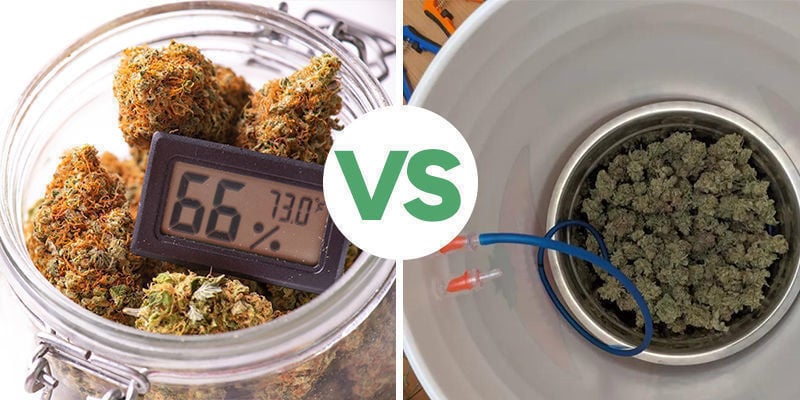
Curing weed is all about air exchange and humidity control. At its simplest, it involves opening and closing a jar once a day. But over the weeks, this can become quite time-consuming, so automating the process has clear benefits.
Manual curing
As mentioned, manual curing involves going to your jars once a day, opening them, waiting a little, and closing them again. As a task, it’s not very labour-intensive. However, it does require you or someone you trust to be present with your weed daily, for up to six weeks. If you’ve already spent several months growing and tending to your crop, you may not want to be bound to your grow for another long stretch of time.
Manual curing is simple and easy, but it can be a bit of a drag.
Pros:
- Greater control over the process
- Allows for careful inspection of buds
- No need for additional equipment
Cons:
- Time-consuming
- Requires daily attention
- Higher risk of human error
Automated curing
If you build yourself an automated curing system, on the other hand, you can outsource the process and allow yourself some time away. This saves a significant amount of time and frees you up to leave the curing process to its own devices. However, if something goes wrong, there is a risk you won’t spot it in time to save your buds. What’s more, setting it up can be a little time-consuming and pricey, so it isn’t suitable for all growers.
Pros:
- Saves time and reduces labour
- Consistent and precise control of the environment
- Reduces risk of human error
Cons:
- Initial cost of setup
- Requires technical knowledge
- Potential for mechanical failures
How to build an automated cannabis curing system
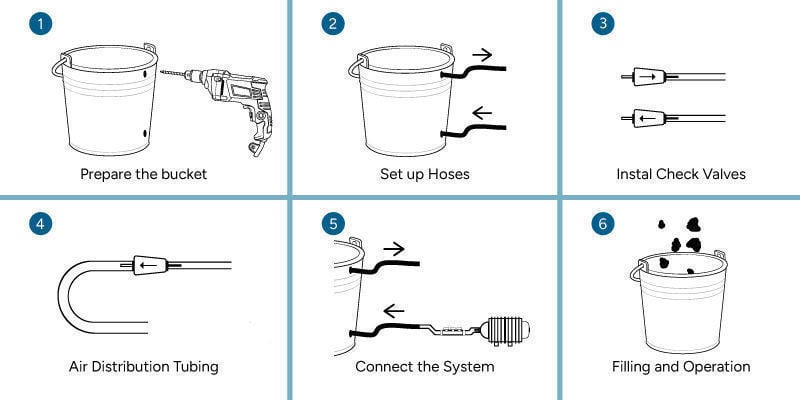

If you want to build your own automated curing system, it can actually be surprisingly simple. You just need the right equipment. Below, find a simple but effective method.
Equipment
- 10–20l bucket: BPA-free is best, and ensure it has a lid with an airtight seal
- Motorised air pump and digital timer: For air circulation and control
- Check valves: To prevent backflow
- Silicone tubing (3mm): For connecting components
- Manifold: To distribute air from the pump
- PVC tubing (16mm): For the main air conduit
- Stainless-steel hose clamp (13mm to 32mm): To secure connections
- Humidity control packs: To maintain optimal humidity
- Safety pin: For creating air holes in the tubing
- Drill with 2.8mm drill bit
Directions
- First, drill two holes in each bucket. One should be near the top and the other near the base. The holes are 2.8mm so that they create a seal around the larger 3mm tubing when it is inserted.
- Now insert the intake hose into the lower drilled hole. This will later be connected to the manifold.
- Cut 15cm of 3mm tubing. This will be used as the exhaust hose. Insert it into the upper hole.
- Attach the check valves to the ends of the hoses inside the bucket, and ensure the proper airflow direction. Attach the larger side of the valve to the bottom hose. With the top hose, attach the smaller side.
- Now cut 1m of 3mm tubing and puncture it every 2.5–4cm with a safety pin or something similar.
- Connect this perforated tubing to the check valve at the bottom of the bucket, securing it with a tight knot.
- Coil the tubing around the base of the bucket in a circle, for even air distribution.
- Connect the intake hose to the manifold, then open the valve.
- Connect the manifold to the air pump and secure all connections with the hose clamp.
- Check with a test run to ensure airtightness and proper valve function. Listen for a hissing sound from the exhaust hose, as this indicates correct pressurisation.
- Once ready, fill the bucket halfway with cannabis.
- Place in a humidity control pack (58–62% RH).
- Continue filling with cannabis until the bucket is full, then place another humidity control pack on top.
- Finally, secure the lid, start the pump, and set the timer to activate the system for 5 minutes every 24 hours. This cycle will maintain optimal RH and gas exchange.
Hints and tips for building an automated cannabis curing system
To refine your automated curing process further, consider the following final tips and tricks:
- Tailor to your strain: Each strain produces buds with a unique physical structure, density, phytochemical content, etc.—and this might affect how long you should cure them for. Airier buds will dry out faster, for example, while denser buds will require more time. There are plenty of resources online to help you get the best from your chosen strain(s).
- Modify our instructions: You may figure out a more suitable way to create an automated cannabis curing system, or perhaps you might find an addition you like elsewhere. Don’t be afraid to experiment and improve. If you come up with something really good, share it with the community!
- Check regularly: Don’t become complacent. Automated systems can go wrong and, to avert disaster, you’ll need to remedy the problem fairly quickly. So still regularly check everything at least a few times a week.
What is the best process for curing cannabis?
Ultimately, the best curing process for cannabis depends on your specific needs and resources. Manual curing offers greater control and the ability to inspect each bud closely, making it ideal for smaller batches or personal use. However, for larger operations or those looking to save time and labour, an automated curing system provides consistency and efficiency. Regardless of the method chosen, proper curing is essential to producing high-quality cannabis with the best flavour, potency, and smoothness.
-
 4 min
4 May 2021
How To Rehydrate Your Dried-Out Cannabis Buds
Your local dispensary had a huge sale, and you bought everything in sight. Or, your last grow-op was particularly successful. Either way, you now have too much weed to handle and things are looking...
-
 5 min
8 November 2020
Bud Washing: What Is It and Why Should You Do It?
It may sound like a crazy idea; washing your buds after you've spent so long growing them. Many worry about their precious strain losing potency and flavour after giving it a wash. However, that...
-
 2 min
11 October 2019
Water Curing Cannabis: What It Is And How to Do It
Flushing removes impurities and can make your smoke a lot smoother and more pleasant. Knowing that, you might be interested to learn that you can apply the same principle when it comes to curing...
-
 3 min
4 August 2019
To Freeze Or Not To Freeze Your Weed?
When looking to store their weed for the long-haul, many will turn to the freezer. Is this a stroke of brilliance, or a bad move? We'll dive into the four elements of weed storage—lighting,...


 United States


