Common Problems In The Cannabis Garden

There's nothing quite like cultivating cannabis from the comfort of your home or garden. Unfortunately, it does come with some pitfalls. Granted, these are more than likely minor, but there are many different ailments that can impact the growth and overall health of your plants. Here we discuss all of the common issues that can plague cannabis plants, and how to recognise the signs and treat the symptoms.
Cultivating cannabis is mostly a joyous and rewarding past time. However, every so often either bad luck or the wrath of Mother Nature can disrupt activities in the cannabis garden. We cannot provide cures and information on all aspects of cannabis growing. Nobody has all the answers.
But by the end of this post, you will be able to avoid most of the common pitfalls associated with cannabis growing. Should disaster strike, you will at least be armed with the knowledge to strike back against invasive nasties of all shapes and sizes.
Better still, you will be able to prep your grow op in advance. Reading the following text is the best way to avoid the most common grower errors and cannabis ailments altogether.
COMMON CANNABIS GROWER ERRORS
- PH And Nutrient Imbalances
- Over/Underwatering
- Heat Stress
- Common Pests, Plagues, And Pathogens
- Nutrient Burn
- Nutrient Lockout
- Light Burn
- Wind Burn
1. PH AND NUTRIENT IMBALANCES
Fluctuations and imbalances in the pH of feed and substrate can spell disaster for the cannabis grower. Fortunately, this is an easy problem to remedy and definitely within the grower's control. Get your growing style dialled in for starters.
Optimal pH for coco and hydro is between 5.5-6.5 pH. Soil is more forgiving and acts as a buffer so as high as 7.5 pH can be tolerable for plants. Every strain has a sweet spot and fertiliser preference. Only time in the grow op and hands on strain experience will lead the grower to dialling in pH and nutes.
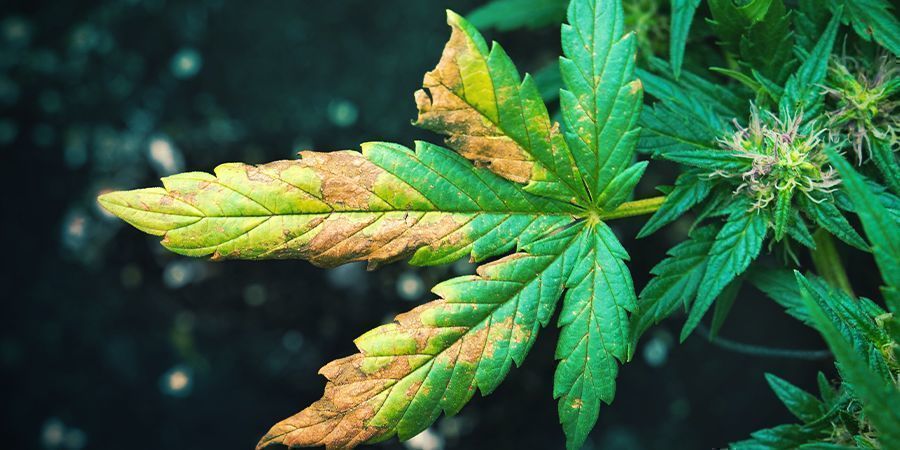
Along the way, imbalances from over-fertilisation and/or use of substandard nutrient products can run the beginner grower into trouble. When plants display wilting and leaf discoloration and brown, burnt edges, it’s usually due to either nutrient burn or nutrient lockout. Either way, the pH is out of balance, and a flush with pure water is the first step towards solving the problem.
Following a flush, the grower must play scientist and carefully scrutinise multiple factors to identify and treat the problem. Testing runoff water post flush with either a pH pen or cheap kit will give you a clue. The plant's behaviour will be another. And finally, inspection with a pocket scope to ensure it’s not pests will lead the grower to the conclusion that a lighter dose of nutrients is probably the best remedy.
Using pH perfect nutrients like the Advanced Nutrients lines are a convenient way to avoid these kinds of problems. Alternatively, if you have already invested in pH and EC equipment, make sure to use high-quality cannabis specific nutrients and get bottles of pH Up and pH Down too.
2. OVER/UNDERWATERING
WHAT IS IT?
Droopy, sickly plants with chlorosis might be suffering from overwatering or underwatering. Either way, the root zone is suffering and growth will grind to a halt. Worse, plants will continue to deteriorate and invite pests and disease until the grower implements countermeasures. Leaves will yellow and drop off from all parts of the plant. Few buds will bloom, though abnormally. Most flowers will die or succumb to pathogens.
HOW TO IDENTIFY
You can tell what you’re dealing with by eyeball-inspecting the medium and touching it with your fingertips. Keeping track of your plants’ watering schedule will help you determine whether plants are underwatered or overwatered. Soggy substrates that are permanently wet are overwatered. Your fingertips will be wet to the touch after you poke a few cm down to check. On the other hand, dry, infrequently watered mediums are underwatered. Soil will look cracked on the top layer and feel bone dry.
If you’re growing in standalone pots and containers, the best way to judge when to water is by feeling the weight of the pot. Simply pick up plants to tell when it’s time to water. Light pots are the green light. Waterlogged containers will be far more difficult to pick up. Don’t forget to bend your knees too.
Hydroponics systems are more vulnerable to under/over watering. Make sure timers are set correctly and constantly monitor plant behaviour and water pH. Starving, under-watered plants will be droopy, and leaves will sag and yellow. Plus the medium will be bone dry.
Over-watered plants can look similar but usually display more leaf discoloration. Also, the medium will be damp to the touch and as roots rot a foul odour will develop. Worse, the grow op can become a habitat for fungi and harmful microbial life if the problem is not resolved.
THE CURE
Of all the cannabis problems to troubleshoot, overwatering and underwatering can be readily corrected. It shouldn’t take long to figure out whether your plants need more or less water. To be certain every time, lift containers before and after watering to literally get a feel for the weight of wet plants and dry plants.
PREVENTATIVE MEASURES
Most growers try to stick to a feeding schedule. It’s important to maintain an effective wet-dry cycle for healthy root zone and plant development. Monitoring plant behaviour and water runoff will help you achieve this. If you can’t pick up your pots to check by weight when they need watering, you can invest in a water/moisture meter to keep track.
3. HEAT STRESS
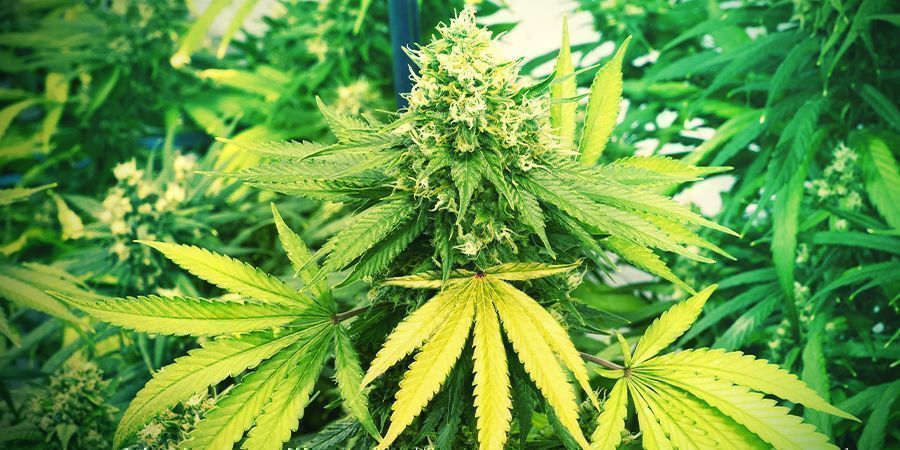
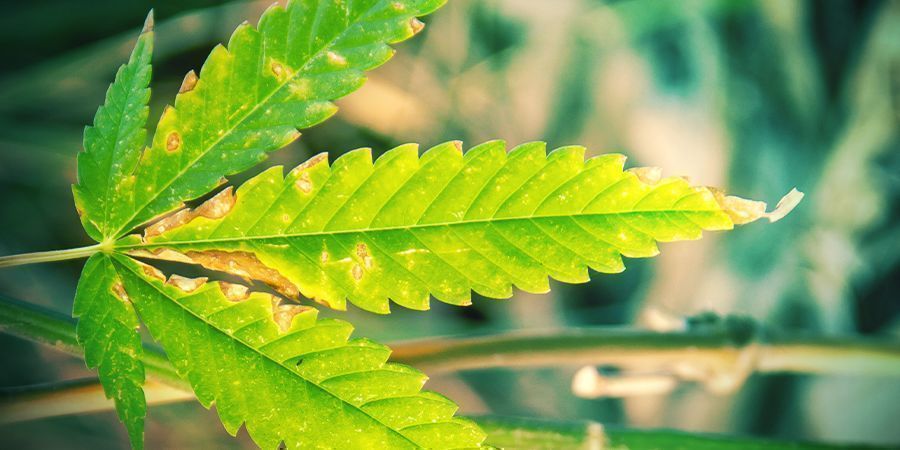
Indoor and outdoor heat stress looks pretty similar. Leaf edges will appear burned and will yellow and brown. For the indoor grower, all you need to do is adjust the position of the grow lamp and/or the environmental controls.
Keeping the plant canopy in the sweet spot is the objective. Test with a light meter or use a tape measure and estimate the optimal distance. A good rule of thumb is to put your hand near the canopy. If it is uncomfortable for you, it is uncomfortable for your plants, and lights need rasing.
Outdoor heat stress is more difficult to control. But the grower can still take effective countermeasures. Shading plants will help and increase watering too. Ordinary green gardening shade material can be used to build a simple screen. Use it to filter out some of the intense sunlight. Sowing the best cannabis seeds in the right season will help avoid this problem. Study the local weather data in advance.
4. COMMON PESTS, PLAGUES, AND PATHOGENS
-
SPIDER MITES
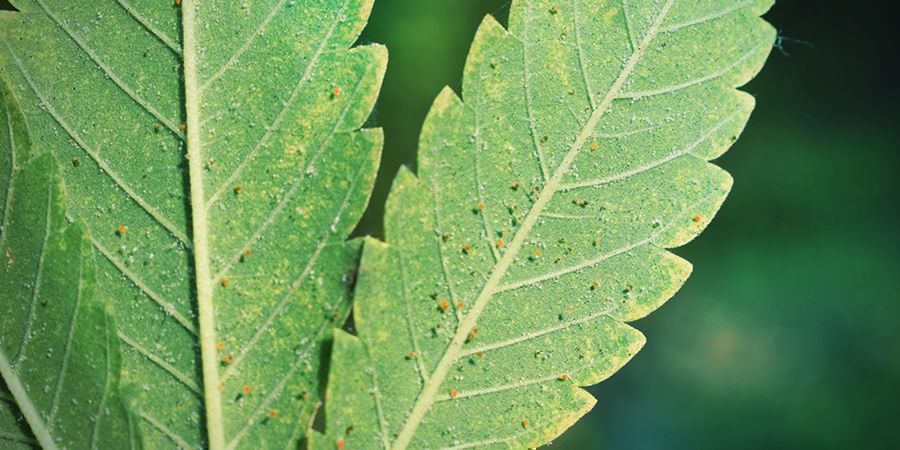
Creepy crawlies always threaten to invade the cannabis garden. Cleanliness and a quarantined grow op are the best ways to keep them from bothering your marijuana. However, should pests attack, it’s most likely going to be spider mites.
Spider mites are mostly an indoor grower’s pest. They are tiny nasty creatures that will web up your bud and utterly ruin your weed. You can only see them with the naked eye when they are crawling around in clusters. Eliminate them immediately with specialist anti-spider mite sprays during vegetative growth. If Spider mites are present in the grow op during bloom it’s game over.
A spider mite infested flowering cannabis plant must be bagged and removed from the grow op immediately. Unfortunately, past vegetative growth spider mites are a nightmare. It’s best to scrap the crop and thoroughly decontaminate the grow space before restarting.
-
FUNGI AND MOULD
Fungi are not always bad news. The best way to keep the nasty varieties at bay is to add beneficial fungi. Add Mycorrhizae to soil or coco and supplement hydro solution with one of the high-grade liquid alternatives.
Hydro growers should stick with hydro specific nutes and avoid using thick organic fertilisers entirely. Otherwise, the reservoir could become a nasty fungi colony and/or irrigation might get blocked.
Botrytis is the grey mould fungus that marijuana growers fear most. The dreaded bud rot will literally rot buds from the inside out. Worse, it spreads easily from plant to plant and is virtually incurable. Keep humidity levels low during bloom approx 40% RH.
Make sure the grow op has good air flow too. This is especially important for ScrOG set ups packed with dense colas. Invest in high-quality fans and maintain optimal environmental conditions from seed to harvest. Supplementing with liquid silica toughens plants cell walls and makes them less susceptible to threats. Rhino Skin by Advanced Nutrients is very effective.
Outdoors, don’t plant too late or the rains could spoil the harvest. A basic greenhouse from a discount supermarket is a cheap solution if the weather is likely to be bad for a spell during the grow. Bud rot only strikes vulnerable marijuana plants growing in humid conditions. Get your grow op correct, and fungi and moulds won’t be a problem.
-
PETS, RODENTS, AND SLUGS
Household pets must be kept out of the grow op. Even if Fido is perfectly well trained and unlikely to munch the crop, he could be a passenger for insects or other unseen nasties. Plus, hair has a nasty habit of sticking to resinous buds. Similarly, outdoors fence off the plot if necessary to keep the pets from getting too close.
Rodents can be avoided by implementing basic good housekeeping practices and dealt with by using conventional traps in most cases. If rodents like rats and mice are a serious problem, you need a new spot for the grow op.
Slugs can be denied access to the cannabis garden by sprinkling some salt around the perimeter to form a no man’s land for slugs. If they are particularly kamikaze slugs, then apply some copper tape around the upper rim of pots. A combination of both should repel the local slug populace.
5. NUTRIENT BURN
WHAT IS NUTRIENT BURN?
Nutrient burn refers to when cannabis plants are overfed with nutrients such as nitrogen, phosphorus, and potassium. Cannabis plants require a certain amount of nutrients to thrive, however, when given in too large a dose, plants begin showing stress symptoms.
This is a classic rookie mistake. Novice growers often operate under the philosophy that if plants need nutrients to thrive, the more the better, right? This, of course, is far from the reality of how cannabis plants function.
SYMPTOMS/HOW TO IDENTIFY NUTRIENT BURN
The main visible symptoms of nutrient burn can be detected when the tips of leaves begin turning brown. This brown colour will start moving along the leaf and the tips will bend slightly and turn into a crispy “claw”. Nutrient burn can start showing on a couple of leaves or the entire plant.
COMBATTING NUTRIENT BURN
Combatting this issue greatly depends on the severity and nature of the nutrient burn. One should obviously ease off from adding more nutrients. Checking the mineral levels in soil or hydro systems with a ppm meter is advised. A rough estimate of ideal ppm levels are 650ppm after cloning, 850ppm during veg, and 1050ppm during flowering.
Plants use up more nutrients under stronger lights; if the lighting in the grow area is relatively weak, that’s something to consider. In hydro systems, it’s easier to replace the nutrient content by gently reducing the amount in the water provided. If the soil contains extremely high levels of nutrients, one should flush it with pH-adjusted water, preferably distilled water if possible. This should be done by adding enough water so that it drains through the bottom, flushing the nutrients away.
PREVENTING NUTRIENT BURN
The soil you purchase shouldn't contain extreme levels of fertiliser as this can nutrient burn the seedlings. The water used for the plants should be relatively clean. Dirty tap water contains too high ppm levels. Even when the appropriate amount of nutrients are added, the water itself has too many particles in it, often leading to nutrient burn.
One should consider purchasing distilled water or DIY by reverse osmosis. Nutrients specifically designed for cannabis plants should be used, but nutrients for tomatoes will work as well if you have no other option. The dosage of nutrients recommended by product companies is almost always overestimated. As a rule of thumb, start with ¼ of the lowest recommended dose and work your way up.
6. NUTRIENT LOCKOUT

WHAT IS NUTRIENT LOCKOUT?
A nutrient lockout occurs when plants are not absorbing certain nutrients which are at their disposal. When the pH levels are not optimal or the nutrient and salt contents are too high, this phenomenon is likely to happen.
Plants have a biological process where too much of one nutrient can lock out other nutrients. For example, when too much nitrogen is absorbed by the plant, it can lock out potassium and calcium from being absorbed. When nutrient lockout is not fixed immediately, cannabis plants can die quite fast.
SYMPTOMS/HOW TO IDENTIFY NUTRIENT LOCKOUT
The symptoms of nutrient lockout will closely resemble signs of nutrient deficiency. The plants start looking flimsy, the leaves become weak, yellow, and will start to curl. The best way to identify nutrient lockout is to first check the pH level of the soil or hydro system. For soil, the sweet spot is between 6.0-7.0pH, while for hydro, it’s approximately 5.5-6.5pH.
When the pH levels are off these desired values and the aforementioned traits appear, it's a sign that you’re dealing with nutrient lockout. Also, you could upload pictures of your plants to cannabis forums to know whether you’re dealing with a nutrient lockout or some other matter. Cannabis enthusiasts are helpful. But take their advice with a grain of salt.
COMBATTING NUTRIENT LOCKOUT
We can't stress enough how important it is to maintain the correct pH levels for your plants. When nutrient lockout is detected, it’s important to identify your medium’s pH and/or which nutrient is causing others to be locked out.
The best way to combat nutrient lockout is to flush the plants, then add an appropriate amount of nutrients. Flushing is the best option because when the pH levels are corrected, the locked-out nutrients and salts will be removed, preventing your plants from undergoing further complications.
PREVENTING NUTRIENT LOCKOUT
Purchasing high-quality soil and being aware of its contents is important. It's crucial to make sure that the water quality is pure and the pH levels are dialled-in. Also, one must consider that various fertilisers can change the pH of the water, which can lead to a nutrient lockout. One shouldn't overfeed the plants with one nutrient just because it's recommended by some random blog.
7. LIGHT BURN
WHAT IS LIGHT BURN?
Imagine baking under the sun for 18 hours straight. Doesn’t feel great, right? Cannabis plants don’t like prolonged exposure to intense light and heat. Light burn is a very common occurrence in indoor cannabis plantations. Light burn happens when the plants are too close to the LED or HPS lights and can’t handle the stress. It’s important to note that light burn and heat stress usually go hand in hand. When plants are too close to the lamps, heat and light exposure is elevated.
SYMPTOMS/HOW TO IDENTIFY LIGHT BURN
Light burn symptoms generally show on the tops of plants. Leaves start turning yellow, brown, and spots can appear. The middle veins of the leaves will remain green as the light burn often occurs from the outside of the veins and moves inward. Light burn is easy to identify.
In most indoor gardens with intense lighting, the leaves nearest to the lights exhibit the aforementioned symptoms and not the leaves further away. Light burn doesn’t occur in outdoor environments because the sunlight works differently from artificial lamps. However, when plants are moved from indoor environments outdoors, they can exhibit light burn signs.
COMBATTING LIGHT BURN
Remember, there are two things to consider: heat and light intensity. If leaves and buds show signs of light burn, you can move the lights further away from the plants, and if necessary, replace the potent lights with weaker ones; for example, moving from 600W to 400W. The temperature of the indoor environment should be consistently around 25°C in most cases. Having proper air circulation in an indoor cannabis garden is crucial to cooling down the space.
PREVENTING LIGHT BURN
It's important to check up on your plants and study the leaves/buds closest to the lights. Purchasing less intense lights for the flowering period is a smart move because that’s when the plants often develop light burn. Ensuring proper temperatures and air circulation in the grow room is also a smart move. It’s not recommended to migrate the cannabis plants from indoor to outdoor environments.
8. WIND BURN
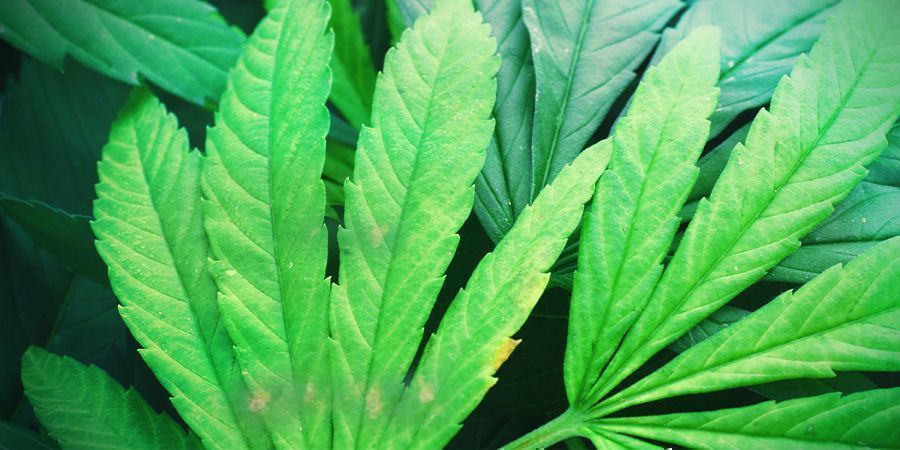
WHAT IS WIND BURN?
Cannabis plants enjoy a gentle breeze, just like us humans. However, if the wind is too intense, plants start exhibiting signs of stress, which is coined as "wind burn". This often happens in indoor environments where the limited space places fans in awkward positions. Outdoors, this issue rarely occurs because even if one day it's windy, the winds eventually stabilise while indoor fans blast air 24/7.
SYMPTOMS/HOW TO IDENTIFY WIND BURN
Wind burn is quite easy to identify because of the nature of indoor grow operations. If the leaves closest to the fan turn into downward curling “claws” that look like creepy green fingers, you're dealing with wind burn. Also, when the fan is pointing directly at the plants, that’s a telltale sign as well. The movement of the leaves is a good tell too. If they're furiously flapping about, the wind is too strong.
COMBATTING WIND BURN
The way to combat wind burn is to position fans shrewdly and on the correct settings. Given that cannabis stems and branches are strengthened by wind over time, the plants and leaves should be moving gently, not like they’re in the middle of a cyclone. The air from the fan should blow between the lights and the canopy. Ultimately, the fan should be moving from side to side. Also, placing a smaller fan that circulates a gentle breeze vertically up and down the plants is a good tactic.
PREVENTING WIND BURN
The best way to prevent wind burn is to plan one’s grow operation before sowing the seeds. Wind burn often occurs when growers try to squeeze too many plants into indoor grow rooms/tents. Plants need space to grow and breathe, so don’t overdo it. You won’t end up with more weed anyway, just more wind burn and other potential issues. Be sure to purchase fans with several settings so you can tailor it to your grow. One could also point the fan toward the wall in order to not to expose the plants to direct wind.


 United States

