


-
 Vaporshop
All Categories
Vaporshop
Vaporshop
All Categories
Vaporshop
- Top 10 Vaporizers
- Spare Parts & Accessories
- AirVape X
- AirVape XS GO (2021)
- Arizer Air MAX
- Arizer Extreme Q
- Arizer Solo 2
- Arizer V-Tower
- Arizer XQ2
- Boundless CFC 2.0 Vaporizer
- Boundless CFX
- Boundless TERA (V3)
- CRAFTY+
- DaVinci IQ2
- DaVinci IQC
- DaVinci MIQRO
- Dr. Dabber Boost EVO
- Dr. Dabber Stella
- DynaVap Omni 2021
- DynaVap VapCap "M" PLUS 2023
- DynaVap VapCap 'M' 2021
- DynaVap VonG (i) Titanium
- Dynavap The "B" Series
- Eagle Bill
- Firefly 2+
- Flowermate Aura
- Flowermate Cap Pro
- Flowermate Slick
- Flowermate V5.0S Pro
- G Pen Connect
- G Pen Elite II
- G Pen Micro+
- G Pen Pro
- G Pen Roam
- Hydrology9 Vaporizer
- Hyer Big-E Rig
- MIGHTY
- MIGHTY+
- PAX Mini
- PAX Plus
- PLENTY
- Pax 3 Vaporizer
- Puffco Peak PRO Smart Rig
- Puffco Peak Smart Rig
- Puffco Plus
- Storm Vaporizer
- The Proxy (Puffco)
- VOLCANO CLASSIC
- VOLCANO HYBRID
- Vape-Lifter
-
 Smartshop
All Categories
Smartshop
Smartshop
All Categories
Smartshop
- Top 10 Smartshop
- Zamnesia Gift Cards
- After Party
- Aphrodisiacs
- Aromatherapy
- Blue Lotus
- CBD Vape Juice
- Capsule Machines
- Crystals, Gemstones & Minerals
- Dream Herbs
- Drug Tests
- Extracts
- Happy Caps
- Herbal Tea
- Herbs & Seeds
- Incense
- Kanna
- Kratom
- LSA Seeds
- Mescaline Cacti
- Microdosing
- Nootropics
- Relaxing
- Salvia divinorum
- Smart Seeds
- Stimulants
- Supplements
- Tinctures
- Vape Herbs
-
 TRIBE
All CategoriesTRIBE
TRIBE
All CategoriesTRIBE
- My Membership
- Spend Gift Points
- Exclusive products
- Earn Extra Gift Points
- Early Access
- Refer a Friend
- Information
 United States
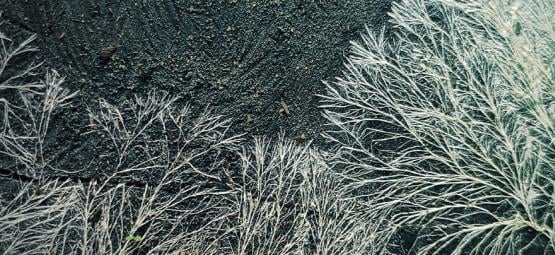
Zamnesia Ready-2-Grow Bag Manual


With these straightforward instructions, you’ll be harvesting magic mushrooms at home in no time using the Zamnesia Ready-2-Grow Bag. Just follow each step carefully to ensure success.
Here are our simple and easy-to-follow instructions for growing mushrooms at home using the Zamnesia Ready-2-Grow Bag. Follow each step carefully, and you’ll be ready to harvest mushrooms in as little as three weeks.
What’s included with the Zamnesia Ready-2-Grow Bag?

When your kit arrives, it really is ready to go. Inside the box is the grow bag, which may become wrinkled during transit. Gently shape it into the desired form, but do not open or cut it. Everything you need to cultivate mushrooms is contained within the bag.
Cleanliness is paramount with mushroom grow kits, so it’s highly recommended you disinfect any worktops or surfaces with cleaning alcohol. Lastly, wearing latex gloves and a face mask while following the steps outlined below is another fantastic way of reducing the risk of infection or bacteria contaminating your grow bag.
Zamnesia Ready-2-Grow Bag disclaimer:
- The grow bag is fully automatic and does not require any interference or additional handling.
- The grow bag requires the same conditions for colonisation and fruiting.
- Do not cut/open the grow bag until you’re ready to harvest.
- The grow bag should not be placed near plants or flowers, especially during spring and summer, to prevent pests from entering the bag and spoiling your harvest.
- Do not place the grow bag near radiators or other heat sources.
- Do not remove the elastic band around the grow bag, as this simulates the earth surrounding the mycelium in its natural habitat.
- Do not put the grow bag in the fridge, soak it with water, or place it on a heating mat.
How to prepare the Zamnesia Ready-2-Grow Bag

To get your Ready-2-Grow Bag started, you need to place the kit in the ideal location. For the best results, we recommend the following:
- A shaded, well-ventilated area with an ambient temperature of 20–25°C
Optional equipment
While the kit is ready to go as soon as it arrives at your door, the optional equipment outlined below can help improve your yields.
- Latex gloves: To prevent contamination during handling
- Face mask: To prevent contamination during handling
- Hand sanitiser: To prevent contamination during handling
- Hygrometer & thermometer: To ensure conditions are optimal for colonisation and fruiting
Step-by-step instructions

- Place the grow kit bag in a ventilated area. We advise against placing the grow kit bags in cabinets, boxes, basements, etc.
- Ensure that the bag is upright and that the filter inside does not move to the back section of the bag.
- The grow kit bag should be kept in the shade at 20–25°C. Temperatures above 25°C and/or a disrupted airflow to the filter can suffocate the mycelium and ruin the yield.
If you notice that growth hasn’t started or is progressing very slowly, don’t worry, this can happen occasionally and is usually easy to fix.Some areas in a room may have little to no airflow. For example, placing the grow bag on one side of a window might result in slow or no growth, whereas the other side with better airflow can lead to faster and denser development. Poor air circulation can significantly slow down or even stop the growth process.
If you don’t see any progress, try moving the bag to a different spot in the room. Often, this simple adjustment is enough to get things going. - The white coating that appears on the "cake" is a natural colonisation process (it's not mould) and will slowly cover the entire surface.
- After roughly two weeks, you should start seeing the first pins appear. However, environmental conditions may cause the mushrooms to start pinning sooner than two weeks.
- Your mushrooms should be ready for harvesting after roughly one month. However, environmental conditions may cause them to be ready sooner.
- After harvesting the first flush, you can prepare the kit for a new flush. Under ideal conditions, the grow bag can produce up to three flushes. To prepare the bag, lightly spray the inside with water and secure the opening with a paperclip.
Harvesting your Zamnesia Ready-2-Grow Bag

When handling your grow kit bag, you should keep a close eye on cleanliness. Before harvesting your mushrooms, you should always wash your hands (and, to be on the safe side, your forearms). Be meticulous, wash your hands with soap, use a disinfectant gel afterwards, and wear sterile gloves to prevent contamination. Wearing a face mask is also a good idea. Always make sure to use a clean growing area, too.
You might also like
-
 5 min
29 July 2024
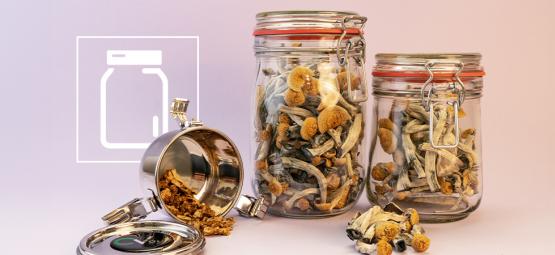
How To Store Magic Mushrooms
If you want your shrooms to stand the test of time, then you'll need to not only dry them properly, but store them adequately too. While not difficult, it is important to get this right if you want th ...
5 min
29 July 2024
How To Store Magic Mushrooms
If you want your shrooms to stand the test of time, then you'll need to not only dry them properly, but store them adequately too. While not difficult, it is important to get this right if you want th ...
-
 5 min
26 April 2024
How To Sober Up From A Mushroom Trip
Shroom trips are very often enjoyable experiences, and when they're not, it's nowhere near as bad as popular culture would have you believe. But sometimes, we might want to come down early. While you ...
5 min
26 April 2024
How To Sober Up From A Mushroom Trip
Shroom trips are very often enjoyable experiences, and when they're not, it's nowhere near as bad as popular culture would have you believe. But sometimes, we might want to come down early. While you ...
-
 4 min
22 April 2021
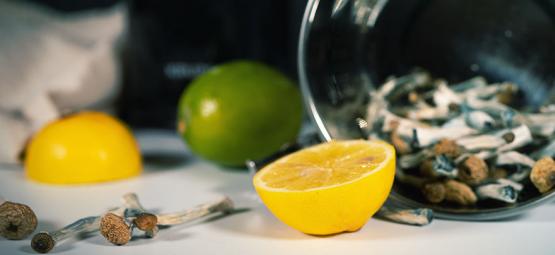
How To Make Lemon Tek For A Faster Mushroom/Truffle Trip
Sometimes, you just want to come up hard and fast. Luckily, there's a way. If you're after mind-bending trips in under twenty minutes, you've come to the right place. Just make sure you're prepared fo ...
4 min
22 April 2021
How To Make Lemon Tek For A Faster Mushroom/Truffle Trip
Sometimes, you just want to come up hard and fast. Luckily, there's a way. If you're after mind-bending trips in under twenty minutes, you've come to the right place. Just make sure you're prepared fo ...
-
 4 min
17 September 2020
What Is Mycelium In Magic Mushroom Cultivation
If you've been looking into growing your own magic mushrooms, we're guessing you've seen the term "mycelium" come up in articles and forum discussions. Like a lot of concepts surrounding magic mushroo ...
4 min
17 September 2020
What Is Mycelium In Magic Mushroom Cultivation
If you've been looking into growing your own magic mushrooms, we're guessing you've seen the term "mycelium" come up in articles and forum discussions. Like a lot of concepts surrounding magic mushroo ...
-
 9 min
19 April 2019
How To Prepare For A Safe Psychedelic Trip?
Here at Zamnesia, we want to make sure you have a good trip on your first plummet down the rabbit hole. Follow these guidelines whether you just want to giggle uncontrollably for a while or give your ...
9 min
19 April 2019
How To Prepare For A Safe Psychedelic Trip?
Here at Zamnesia, we want to make sure you have a good trip on your first plummet down the rabbit hole. Follow these guidelines whether you just want to giggle uncontrollably for a while or give your ...
-
 2 min
29 May 2018
How To Make Magic Truffle/Mushroom Tea
Tea is an ideal way to ingest the magic - it is tasty, gentle on the stomach and absorbs faster. What’s not to like? ...
2 min
29 May 2018
How To Make Magic Truffle/Mushroom Tea
Tea is an ideal way to ingest the magic - it is tasty, gentle on the stomach and absorbs faster. What’s not to like? ...


